This tutorial will demonstrate how to take a single cell in a local Jupyter Notebook and run it in the cloud, using the Valohai platform and its command-line client (CLI).
Valohai is a machine orchestration platform that lets you run your code on your choice of cloud instance, without having to manually set up and launch a GPU unit, install a docker container or shut it down once it’s done. This is not meant to be a definitive guide on how to approach such things in production environment, but a simple “hello world” example on how to get started.
At the same time it also turns out to be a very effective way to do model exploration and get every run automatically version controlled through Valohai so you can always roll back to the code you ran an hour ago, last week or a year ago.
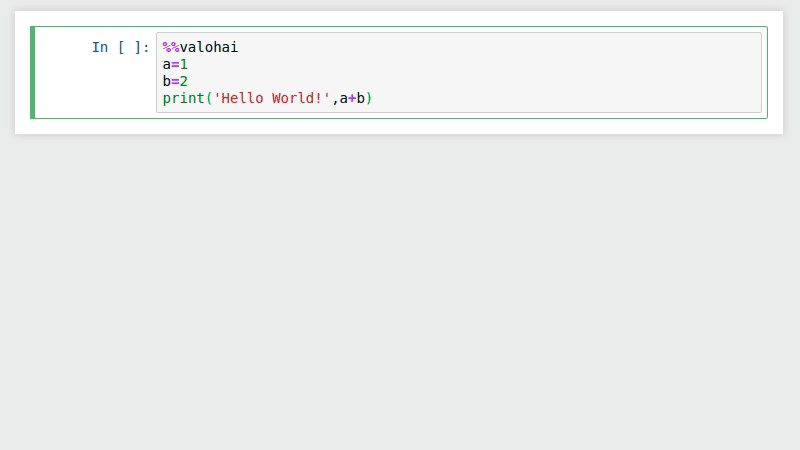
Our approach is to create a simple flag ( %%valohai ) to mark a notebook cell special. When this flag is used, instead of running your code locally, it will execute code in the cloud and get the printed output back.
Prerequisites
-
Valohai account
- If you don’t already have one, head out to https://valohai.com< and create a free account. You’ll have initial credits for computing in your new account.
-
Jupyter notebook
- Choose Python 3
- If you are unsure about security, use a local notebook, as you will be inserting your Valohai password in it.
Running shell commands

It is possible to run a shell command from your Jupyter notebook using the ! prefix.
This is same as typing it into your terminal, with some gotchas.
Each line is executed as a separate temporary subshell, which means things that normally persist per shell will be lost between commands. A good example is trying to change working directory with !cd.
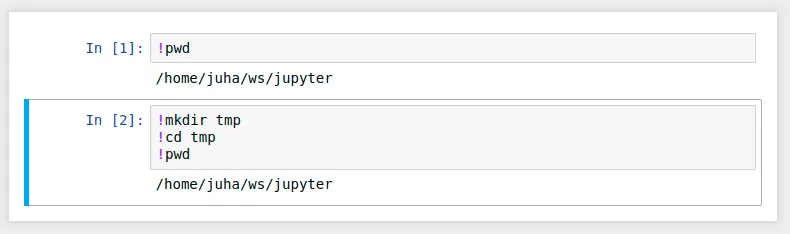
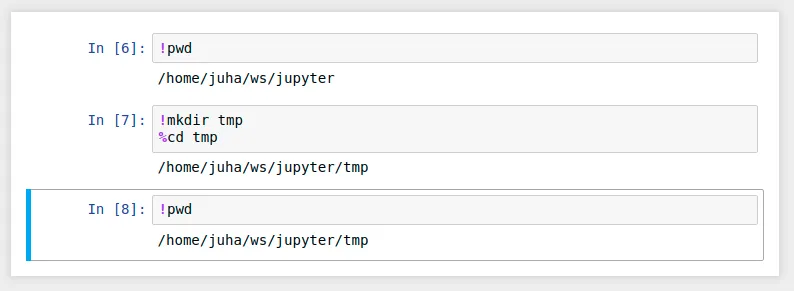
Luckily, you can use the built-in magic %cd instead.
Installing the Valohai CLI
Let’s put our new knowledge into use and install valohai-cli straight from our notebook using !pip3 .
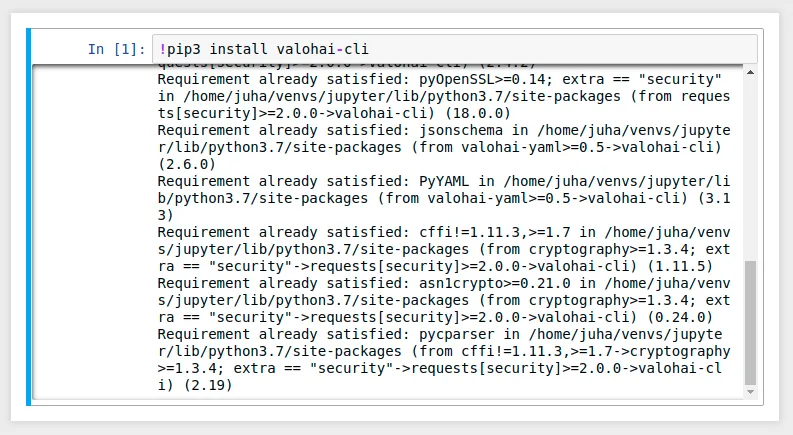
You can obviously do the same from the terminal using a proper virtualenv if that is your thing.
Valohai login and project setup
Before we can run anything in the cloud, we will need some setup. Using the newly installed CLI, we will be doing the following:
-
Login to the Valohai platform using the CLI
-
Create a project into the platform
-
Link a local folder into the project
Valohai CLI is used with the vh command. First task is to login .
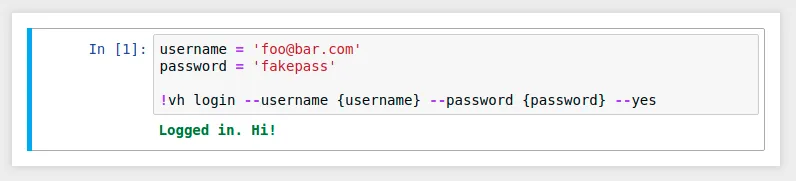
This login is persisted in the notebook’s home directory so don’t worry about running this cell again.
Next we will setup a project name and choose python:3.6 as our Docker container. The list of most common images are available here.
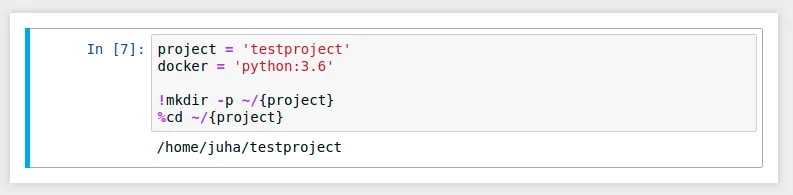
Finally we will use vh to create a new project in the cloud and link the currently active local folder into it.

This is also persistent so don’t worry about rerunning it. In fact if you rerun it, you’ll get an error message. If for some reason you need to relink to existing project, you can use:
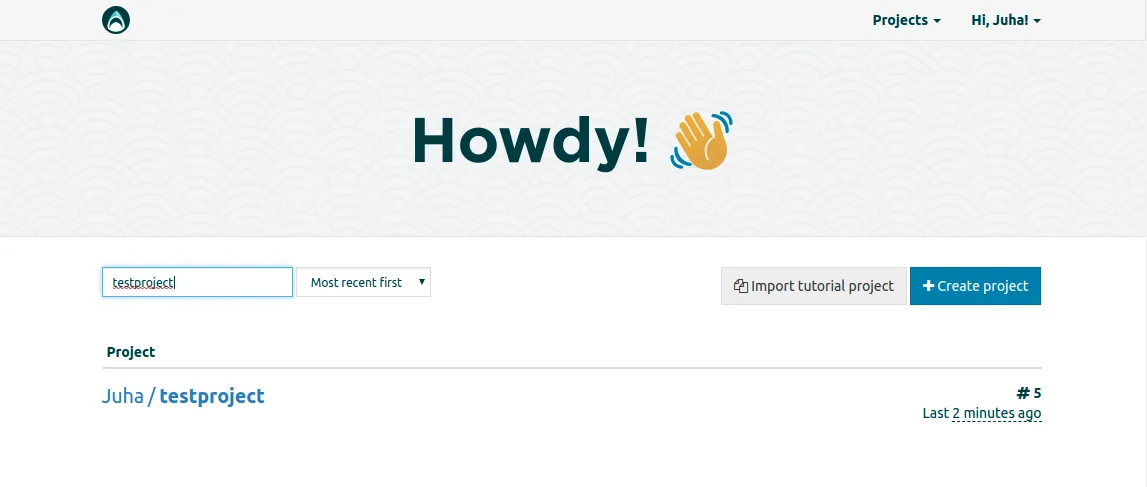
!vh project link {project} --yesIf you now take your browser and check your projects at https://app.valohai.com , you should see your new project:
Magics for cloud execution
A custom IPython cell magic will provide you the ability to do something else than what is the default behavior when executing the cell or a line of code.
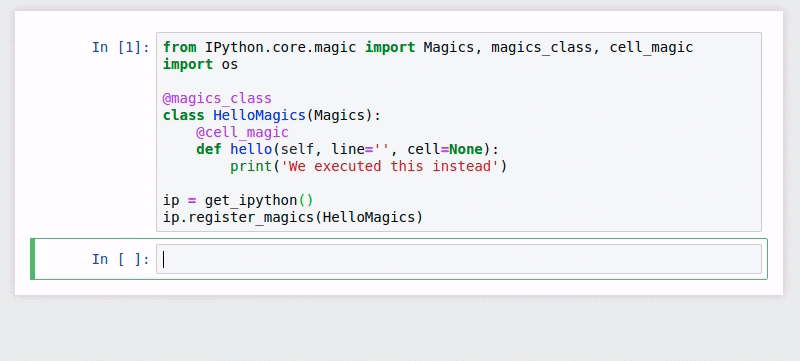
We will define a new magic %%valohai . Putting this thing at the beginning of a cell, should make the cell executable in the cloud.
What the %%valohai command will do:
-
Take all the code in the cell and write it in into a file called execute.py
-
Create valohai.yaml to integrate with the Valohai platform
-
Use vh (Valohai CLI) to send the files and start a new cloud execution using Valohai’s ad-hoc execution mode
-
Use vh to get execution output logs to be shown in the notebook
What we are NOT doing:
-
Sending the notebook state to the cloud. The cell is ran as isolated code.
-
Getting real Python state back. We only fetch the printed output at this point.
While it is possible to achieve both, they are beyond the scope of this tutorial.
Make it fly!
We are finally ready to fly into the clouds. Let’s run a very simple Python script as proof.
First we will run it locally, then in the cloud.
That’s it! If you have any problems in with the example, please don’t hesitate to contact us for any questions.