
One of the hottest areas of application for deep learning is undoubtedly autonomously driving. While the first thing that comes to mind when you talk about the topic is a self-driving car, in fact almost any vehicle can be turned into an autonomous one. For example, it took only one night to train a model for self-steering urban waterways. Yet, cars would be the easiest to look at since this is the most widely discussed use case for autonomous driving.
Thus, we’ll go through the problem space, discuss its intricacies and build self-driving solution utilizing the Unity game engine, training a neural network on top of the Valohai platform. Regardless of the technologies used, you’ll get an understanding of the basics as well as the code to tweak for yourself.
We are not going to use a real car, but a simulator from Udacity created with the Unity game engine. Our code and approach are based on Manajit Pal’s excellent tutorial .
Main steps of the tutorial:
- Collect data while manually driving the car in a simulator
- Create a new Valohai machine learning project and link it to your data and code
- Train a deep neural network to mimic the driving based on training data
- Inference: Let the model loose in the simulator to drive for itself
GitHub repository: https://github.com/valohai/selfdriving-example
Step #1: Gather Data
Our first step is to drive around the track and record replay data. Data will be gathered many times per second.
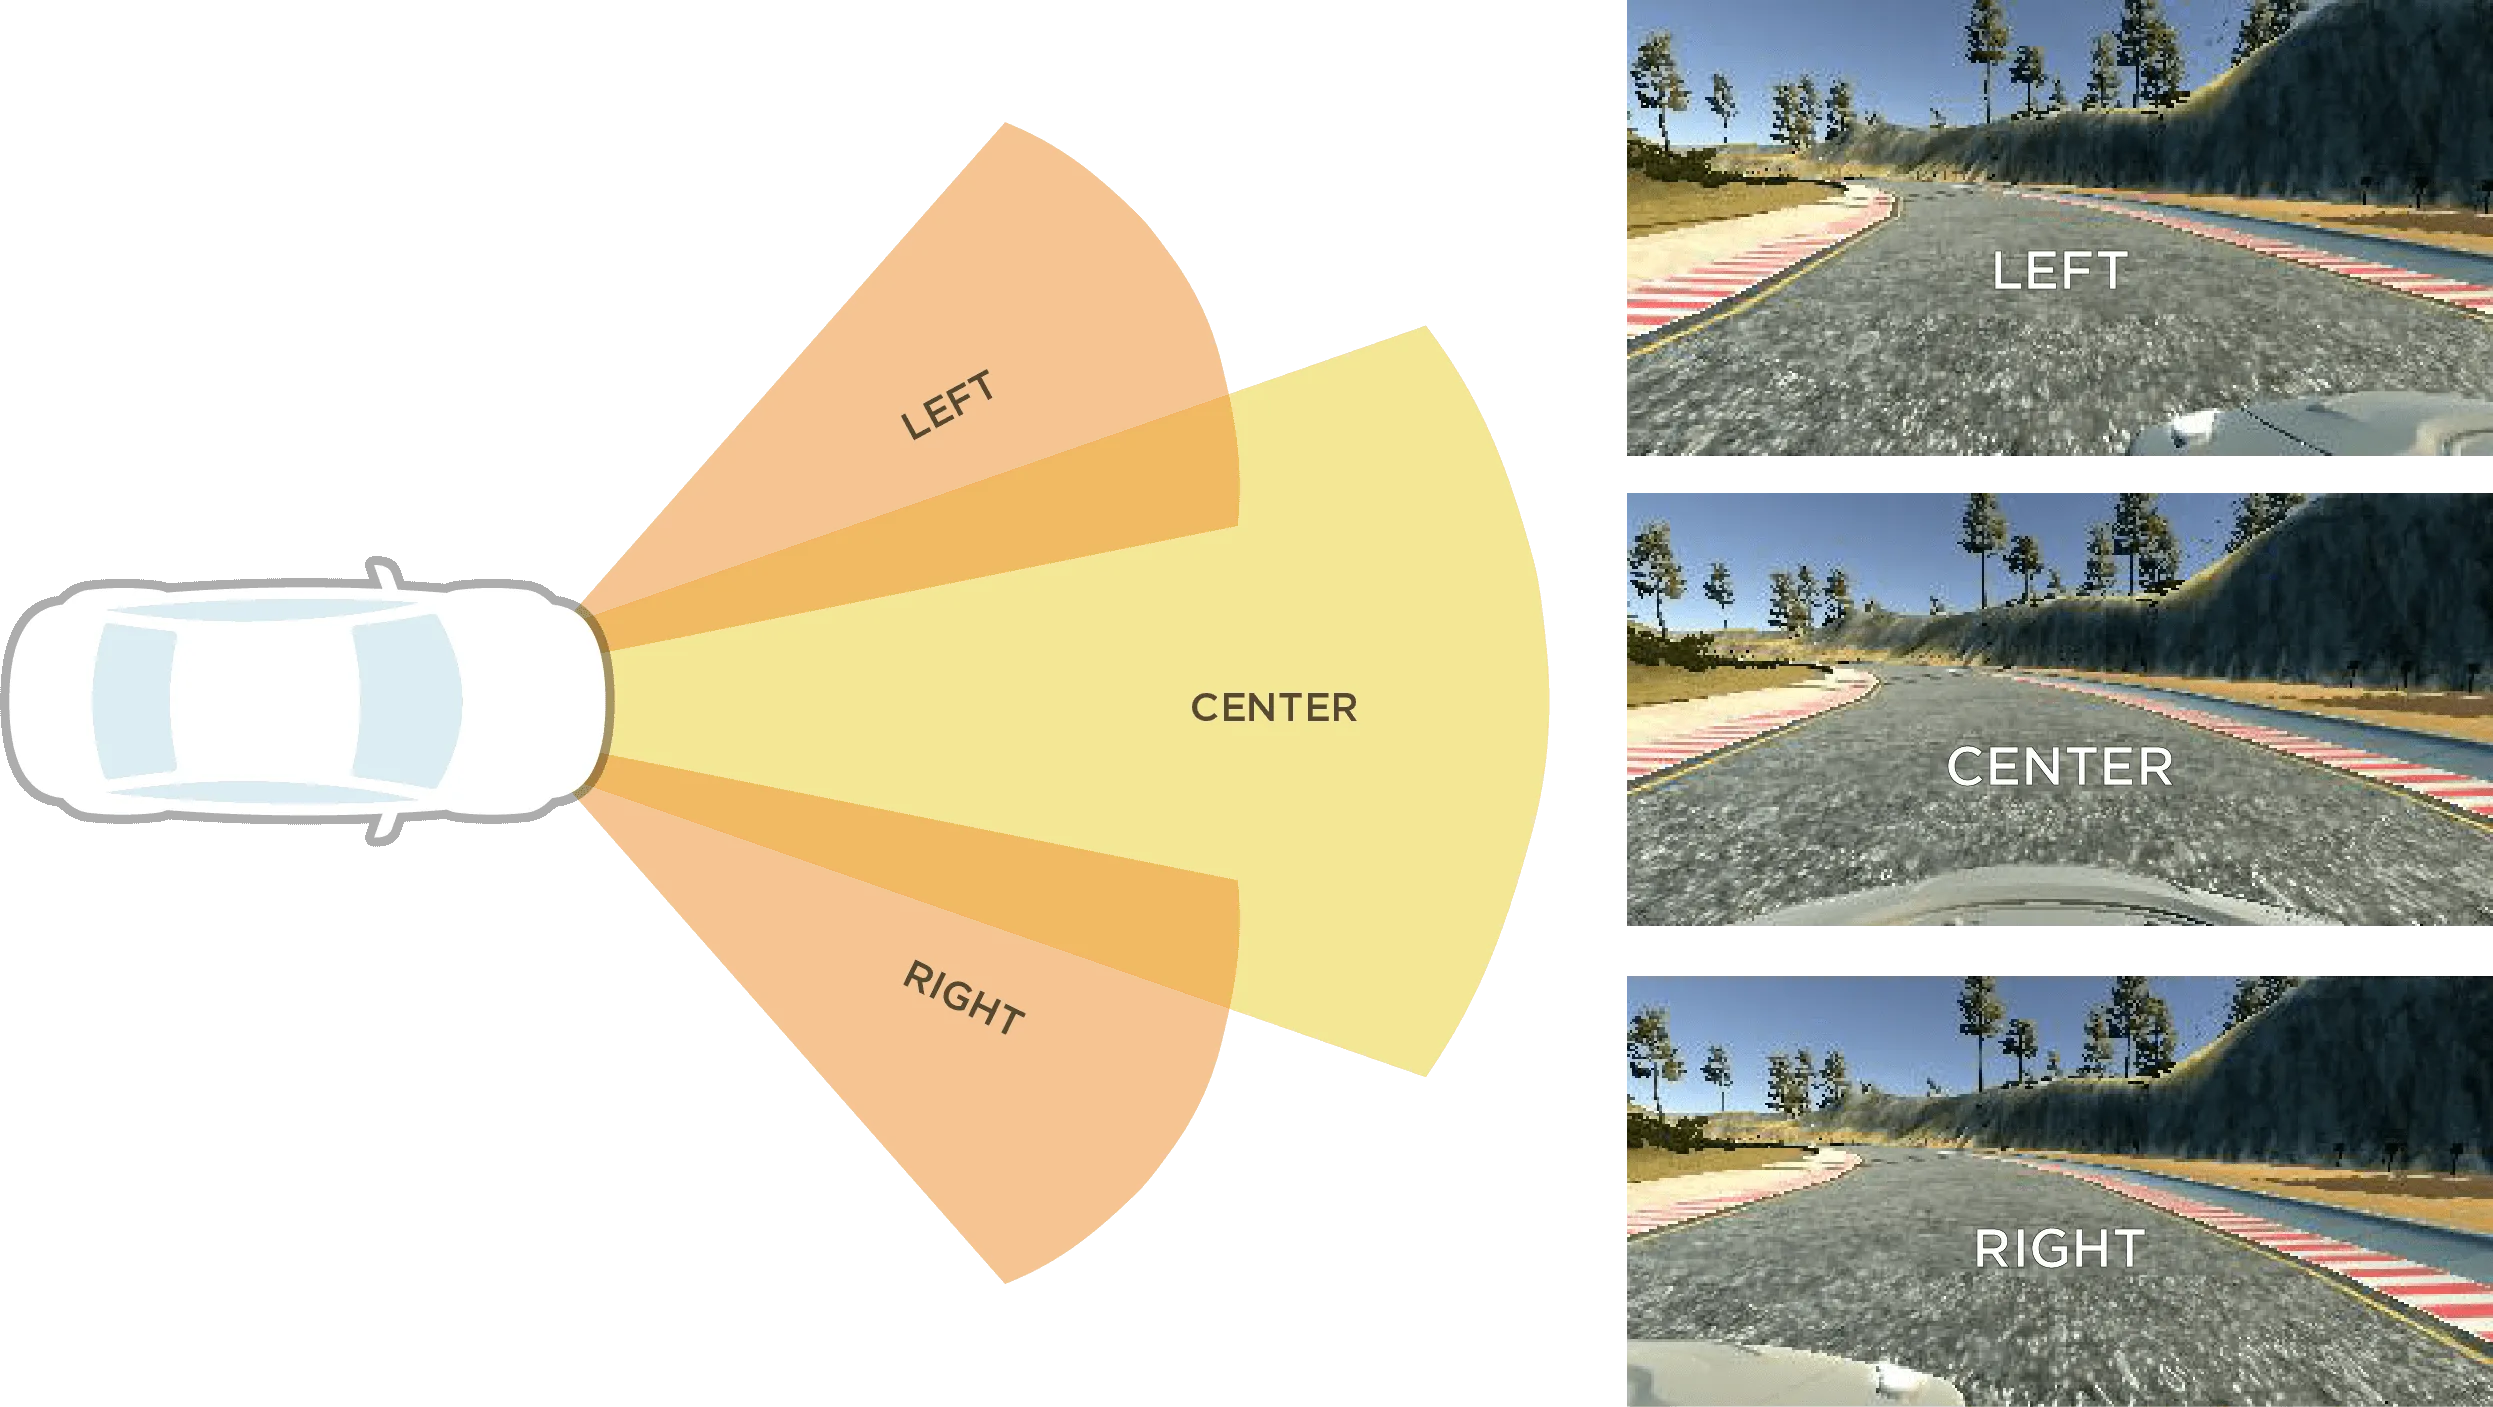
Every data snapshot will contain:
- Image file from the LEFT camera
- Image file from the CENTER camera
- Image file from the RIGHT camera
- A new row in
driving_log.csvfile with:- The orientation of steering wheel (-1 to 1)
- Status of throttle pedal (0 to 1)
- Status of the brake pedal (0 to 1)
- Speed of the car (0 to 30)
Note: If you want to skip the gather step altogether, you can use a prebuilt dataset from https://valohai-examples.s3-eu-west-1.amazonaws.com/self-driving/selfdriving.tar.gz.
First, we need to install our simulator. Download a prebuilt version from here:
1. Select “TRAINING MODE” from the main menu
2. Click on the record button
3. Select the target folder for your data recording
4. Click on the record again
5. Drive around the track a few times
6. Stop recording from the pause button
After these steps, this folder structure should have appeared on your hard disk:
You should have a driving_log.csv file with telemetry data and an IMG/ folder with thousands of images captured from your driving session.
Because we have so many files, it is easier if we compress it as a single tarred file. Open up your terminal, go to the parent of your data folder and tar the entire thing:
tar -czf selfdriving.tar.gz data/
The file selfdriving.tar.gz will contain both driving_log.csv and all the images.
Finally, you should upload the file into a data store of your choosing, for example, AWS S3 or any public URL will do also.
Step #2: Create a Valohai project
The training data should now be sitting in a data store or public URL and waiting to be trained against. It is time to create a Valohai project.
Link your git repository
Create a free account, log in to https://app.valohai.com/, click Create new Project and give it a name.
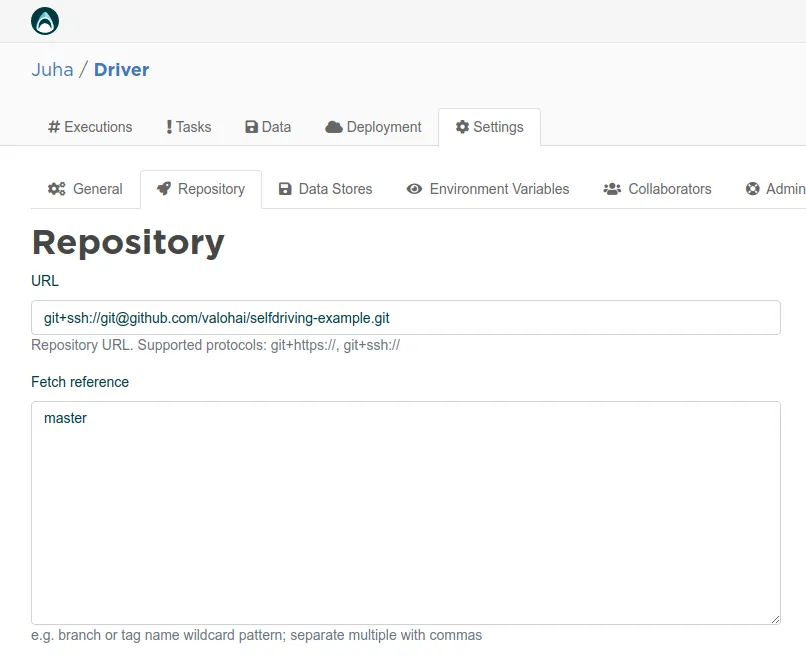 Next, connect to the git repository where your Python code awaits. Click Settings -> Repository from Valohai and type the URL:
 git@github.com:valohai/selfdriving-example.git
Then click Save . Remember that you can use your own repository/fork, too
Link a data store
The next step is setting up the data store connection.
Note: If you skipped the gather step altogether and decide to use the prebuilt data, you don’t need to set up the data store at all.
Note: If your data is in a public URL, there is no need to set up a data store in the Valohai project.
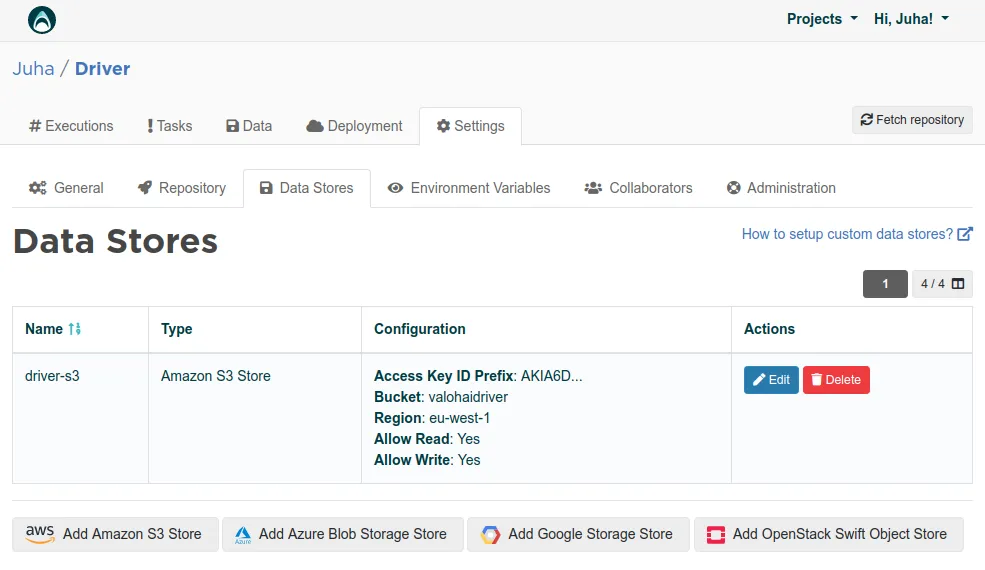 If you put your data in a private data store, set up a data store connection using your credentials. If you get stuck, more help can be found in Valohai Data Stores documentation .
Step #3: Train a deep learning self-driving model
After linking the git repository and data store (optional) to your Valohai project, we are ready to run our experiment and train the model.
Just click the big blue Create execution button on the right, skim through the default settings. These settings are defined in the git project’s valohai.yaml file (for more information on what the YAML file contains, see the Valohai docs ).
The train-model step we select is going to run the train.py script from within our git repository.
If you are using your own data, change the driving_dataset input URL to point to your own tar file.
Finally, click the blue Create execution button at the bottom of the page. Valohai will launch your cloud CPU/GPU instance, install the docker environment within the project, fetch your code and data and run the code. This MLOps is all handled by the Valohai platform so that you don’t need to do it by hand.
During the training process, you can observe your metrics like loss and valid_loss from the metadata tab. This is possible, because Valohai is clever enough to parse all JSON formatted outputs from the execution log and is able to visualize them automatically.
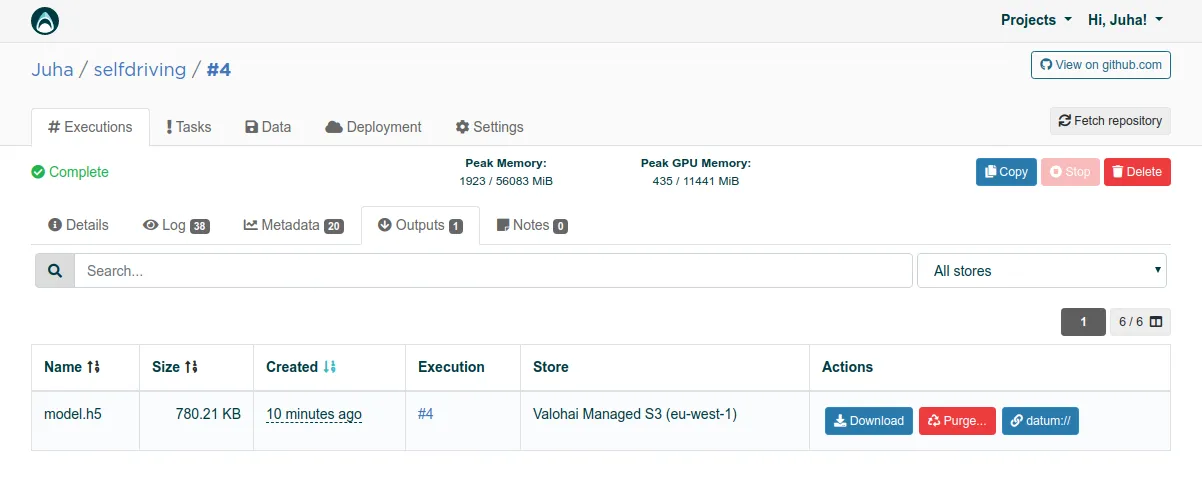 After the execution is done, you can find the saved model from the Outputs folder. Click on the download button and save the
 model.h5 file to your local hard disk.
Easy, isn’t it? It looks a bit like magic. However, if you want to learn more about the model architecture and everything that happens under the hood, you can read the original article that explains the peculiarities of the convolutional neural network developed by Nvidia for training purposes.
Step #4: Inference
Next, we need to clone the git repository to our local computer because we are going to run inference locally. We want to see the car driving with our very own eyes!
Pop your terminal and type:
git clone https://github.com/valohai/selfdriving-example.git
cd selfdriving-example
pip install -r requirements-drive.txt
Finally, copy the model.h5 you just downloaded to the same folder you cloned the repository.
Start the simulator, select AUTONOMOUS MODE and leave it running (the car will not move yet).
Next, go to your terminal and run:
python drive.py model.h5
The terminal output will come alive, the car will throttle ahead and hopefully stay on the road :).
Conclusions
In this tutorial, we demonstrated a “hello world” of the self-driving vehicle on top of the Valohai machine learning platform.
Many steps were left manual for the sake of understanding. In real life, one would automate the file uploading and downloading using the Valohai API / CLI and possibly add automated tests answering questions like “did the car stay on the road” or “did we hit anything”. These could be executed inside a docker container in Valohai, to make the entire pipeline fully automated.
Despite the possibilities that machine learning provides to propel autonomous driving, a study conducted by Capgemini in early 2019 saw that only 10% of the major automotive players use AI at scale. One way to break the spell would be to automate machine orchestration, version control, and CI/CD processes with machine learning tools like Valohai.