
We continue to share our tips and tricks about Jupyter notebooks. Previously, we have discussed how to [run them on any cloud provider] (/blog/run-jupyter-notebook-any-cloud-provider/). In this article, we want to talk about five hacks for faster and easier work in the notebooks, including theme customization.
#1 Running shell commands
When you are writing code in a notebook - or any editor - there is often a need to run shell commands. The most common scenario is to install Python packages, but it could be anything from calling the cloud provider CLIs to inspecting the contents of a local configuration file.
Jupyter allows you to run these bash commands straight inside a notebook cell using the ! character. For example:
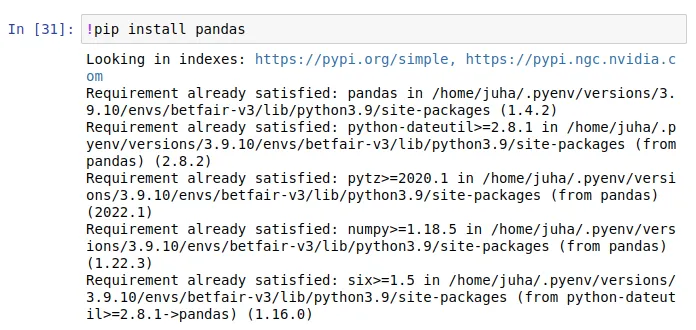
This will install the latest Pandas package into your currently active Python environment.
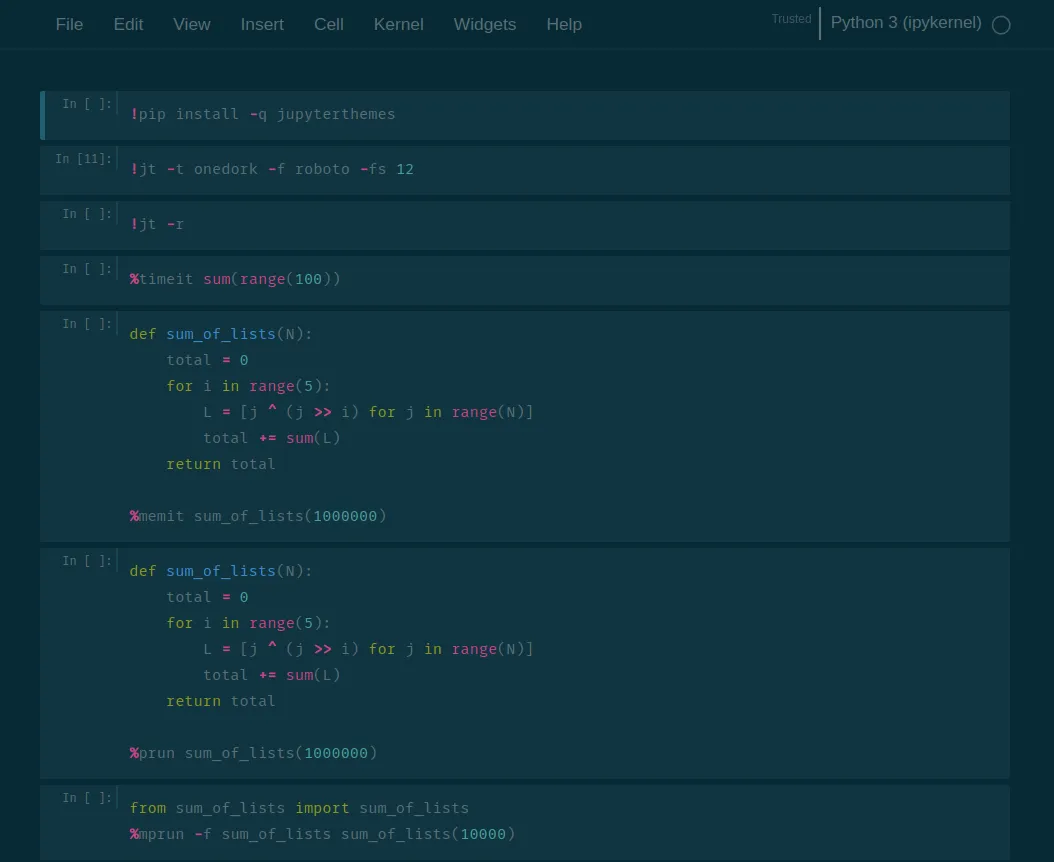
As the installation usually downloads many things and the output is quite spammy, we recommend using the -q parameter with !pip which silences the output.

Don’t worry; you’ll still get all the errors if the installation is unsuccessful.

The great bonus about using the !pip in a notebook cell, instead of running it in the shell, is that the dependency for Pandas is documented for someone who picks up this notebook later on.
If you need to run multiple shell commands or a very long complicated one, we recommend using the %%bash

#2 Code completion
Code completion is a common feature in editors for programmers. It looks at what you have typed already and tries to offer suggestions for finishing it. Mostly useful for removing the need to memorize method names in a 3rd party library.
Most IDEs offer code completion without any hotkeys. They merely wait for you to stop typing and start making suggestions. Jupyter is different, and the code completion feature is “hidden” behind the TAB key.
Just start typing something into a notebook, press TAB, and voilà.
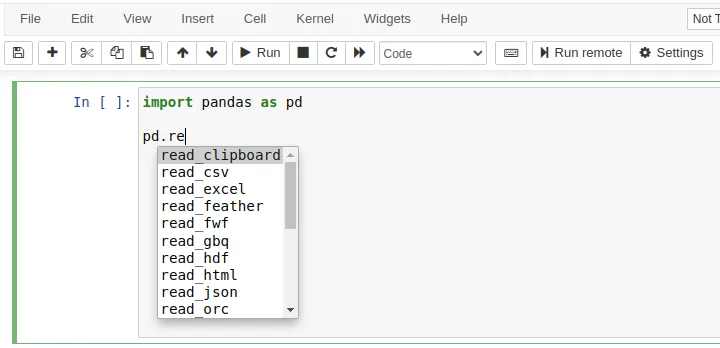
You can also see the signature of a method with SHIFT+TAB. SHIFT+TAB+TAB does the same but makes the popup larger. SHIFT+TAB+TAB+TAB makes it even bigger!
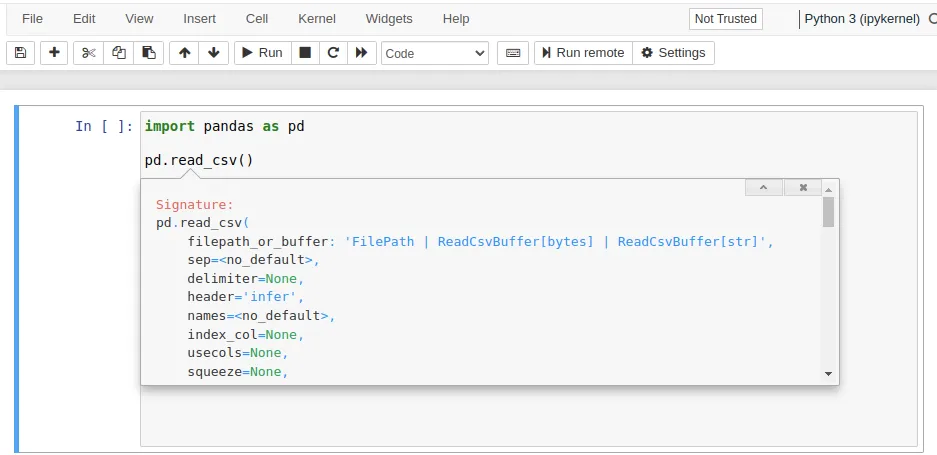
Also, note that it doesn’t work before you have executed the cell at least once. It is fair to say that some design choices in Jupyter are pretty peculiar.
#3 Performance and memory profiling
Every once in a while, you face a situation where your code is too slow. The worst approach for getting out of that hole is iterating on the code without measuring the impact. Human beings are horrible at estimating time and even worse at finding the performance bottleneck using intuition alone.
A better approach is to time things, so you can stop guessing. While the Jupyter notebook doesn’t quite match an actual profiler program, it has some built-in tricks to help with optimizing your performance.
The simplest of them is the %timeit magic. It will simply time a single line of code.

If you want to time an entire cell, you can use %%timeit instead.

Now the timing is nice. You may find clues about the bottlenecks of your code, but if you want to dive deeper, you need to go down the call stack and measure everything. The %prun magic will time the code and also every submethod call. This way, you’ll have more information about where the time is spent.
For example:
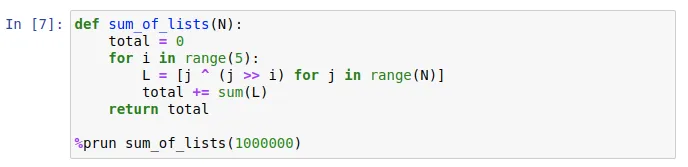
14 function calls in 0.473 seconds
Ordered by: internal time

ncalls  tottime  percall  cumtime  percall filename:lineno(function)
    5    0.415    0.083    0.415    0.083 735111113.py:4(<listcomp>)
    5    0.025    0.005    0.025    0.005 {built-in method builtins.sum}
    1    0.024    0.024    0.464    0.464 735111113.py:1(sum_of_lists)
    1    0.009    0.009    0.473    0.473 <string>:1(<module>)
    1    0.000    0.000    0.473    0.473 {built-in method builtins.exec}
    1    0.000    0.000    0.000    0.000 {method 'disable' of '_lsprof'}
The output can be somewhat cryptic, but here we can infer that the list comprehension is taking most (83%) of the total processing time.
There is another precious resource in addition to time: Memory. If you need to figure out your code’s memory usage, there are no built-in tricks in Jupyter. You have to rely on an extension called memory_profiler.
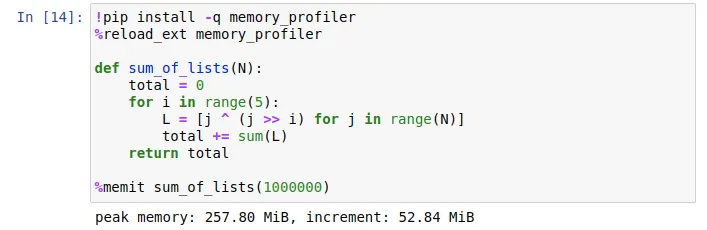
The peak memory is the max memory consumption for the Python interpreter while executing the cell.
The increment tells you how much more net memory the interpreter has hoarded during the execution.
Note that the memory management is out of our hands and up to the Python interpreter. Every time you re-run this profiler, you’ll get slightly different results as the Python garbage collector works in mysterious ways. Just aim for big reductions and don’t worry about the decimals.
#4 Running headless
Did you know that you can execute Jupyter notebooks without any visible parts? This is called headless execution and is made possible by a Python library called Papermill.
Headless is a technical term for executing software without GUI (graphical user interface). It targets an environment where rendering GUI isn’t feasible or the desire to squeeze out all the performance without the GUI overhead. The most common use-cases are automated testing or data pipelines running on cloud hardware.
Papermill takes your notebook, runs all the cells from top to bottom, and finally spits out a new notebook file with all the cell outputs. Let’s see how it works.
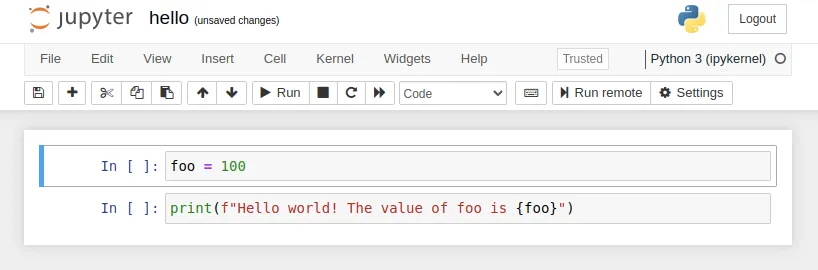
First let’s create a dummy notebook:
hello.ipynb
Then we need to install Papermill:
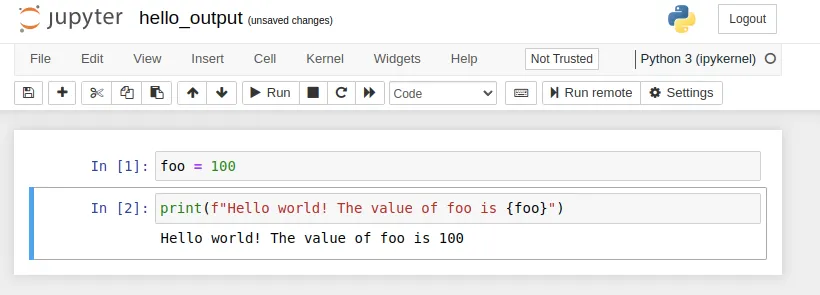
$ pip install papermillNow you we execute the notebook headless from the command-line:
$ papermill hello.ipynb hello_output.ipynb

Input Notebook:  hello.ipynb
Output Notebook: hello_output.ipynb
Executing:       3/3 [00:01<00:00,  2.52cell/s]
The original notebook hello.ipynb will stay intact and there is a new generated notebook.
hello_output.ipynb
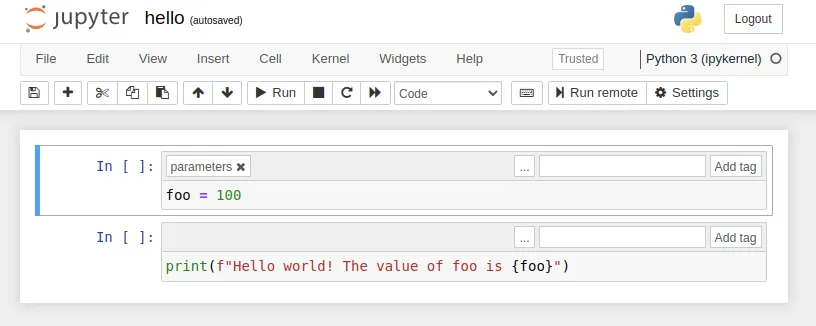
The cool thing about Papermill is that you can also parameterize the notebooks.
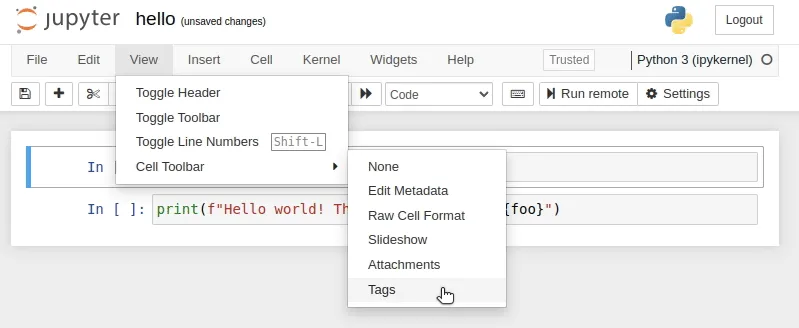
Let’s parameterize our hello.ipynb. It is done by adding a special tag to the cell that has our parameters. In this case we want to parameterize the foo variable.
Open the hello.ipynb and first make tags visible in the notebook. A new header will appear for each cell with an Add tag button. Use it to add a tag called “parameters” into our first cell and save the notebook.
hello.ipynb
Now we can run this notebook headless and set the value of variable foo from the command line:
$ papermill hello.ipynb hello_output.ipynb -p foo 42hello_output.ipynb
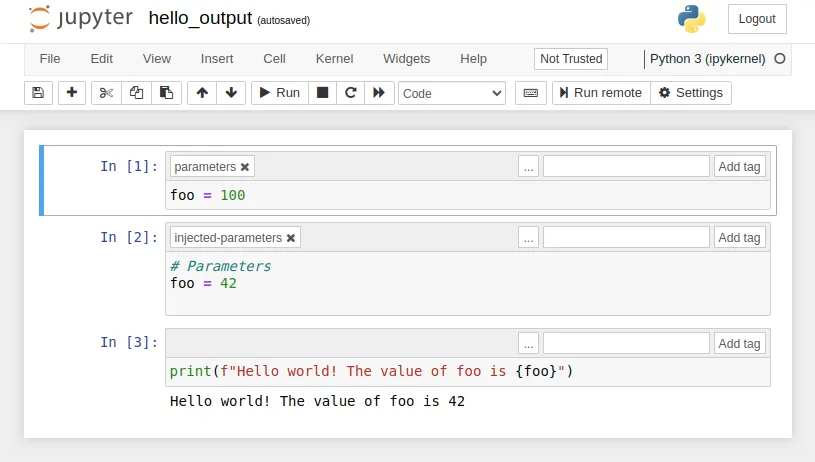
Papermill injects a new cell which overrides the values of default values. This is great as you can see both the defaults and what was overridden from the command line.
Using Papermill is a great way to spice up your ML training pipelines. For example, one could weaponize notebooks for some plotting and visuals in between the data preprocessing and training steps. Why look at boring text logs when you can have nice plots?
#5 Custom themes
Are you jealous of people using VSCode or PyCharm with a dark background that makes you instantly look like you know what you are doing? I’ve heard a rumor that using a dark theme gets you +20% productivity boost. Can it be true? Let’s find out.
Install:
![]()
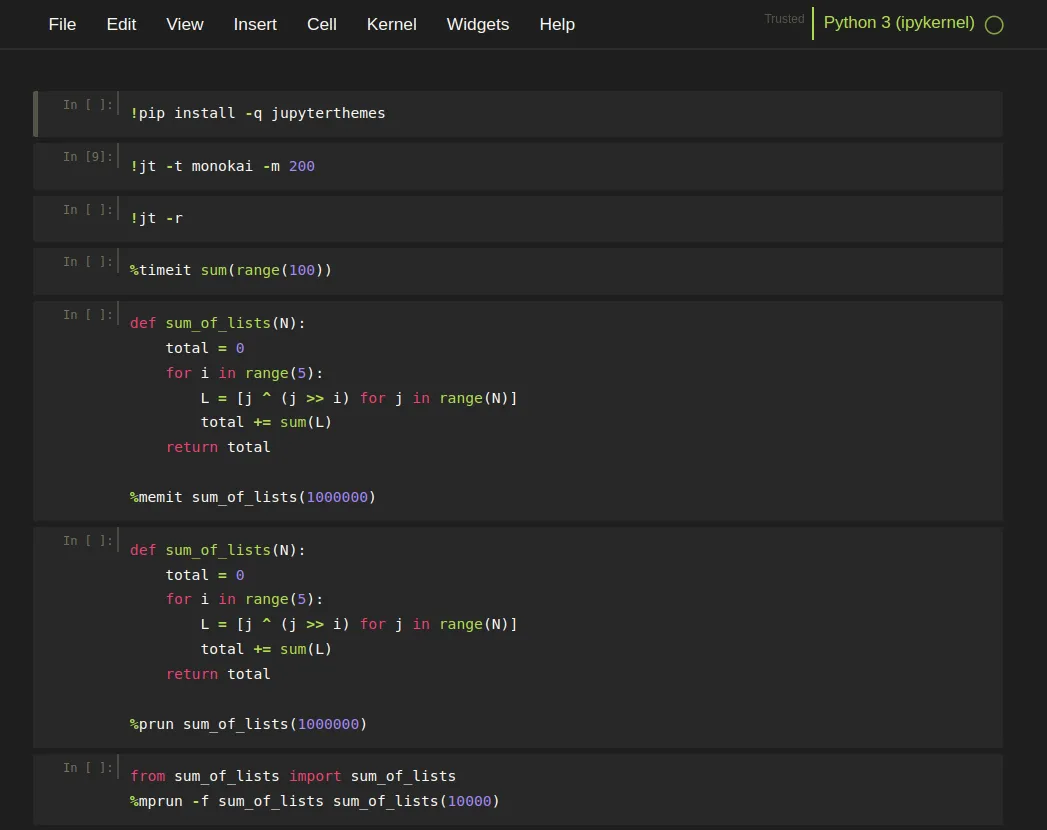
Apply a theme:
![]()
After applying the theme, just refresh the browser and see the results!
You can also alter all sorts of things like the font-size, margins and cell widths with parameters. Here are few example themes:
Reset back to classic theme:
![]()
All the cool kids do it. Don’t fight the natural urge to write code in this elite style. For all you know, a dark theme could be the one thing between you and the next pay grade! :D
I’m just joking here, but let’s be honest, the classic Jupyter notebook is not the most elegant. Changing it is good for your soul if nothing else. Try it!
If you are a Valohai user, you can also try our [extension for Jupyter Notebooks] (/blog/valohai-jupyter-notebook-extension/), which is specially optimized to provide full version control for deep learning experiments, and a smooth asynchronous workflow without additional technical hassle. The experiments are version controlled and fully reproducible with Valohai. Training data, notebook, docker image, hyperparameters, cloud server type, cost, username, and notes are all stored to keep your work safe and reproducible for years to come.
And if you are not yet a Valohai user, be sure to schedule a call with our experts to see if our platform is the right fit for your use-case.